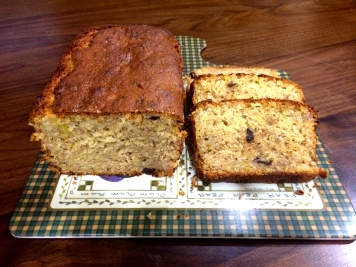
Banana bread with dark chocolate chunks = BLISS.

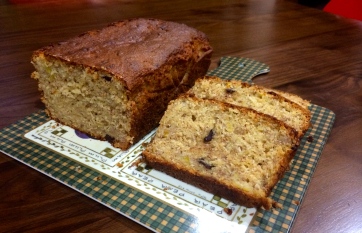
I cannot get over how well this banana bread turned out! It’s moist, fragrant, and beautifully enriched by the sweetness and taste of the bananas – the dark chocolate chips I added also balanced the flavours out perfectly. Each bite into a chunk of decadent chocolate sent a shockwave of semisweet bitterness that was nothing short of scrumptious. I couldn’t think of any better way to start the weekend (and kick away the effects of the night before) than to bake something again for the whole family, especially after Friday when my brownies had been such a success!

IMG_5054

Just like my brownies, I used the slightly more indulgent Valrhona 70% cacao chocolate rather than chocolate chips, but as always, any sort of chopped chocolate or chocolate chips would be fine – be more adventurous and add different fruits instead, like a handful of blueberries, cranberries, or dried cherries!

IMG_5050

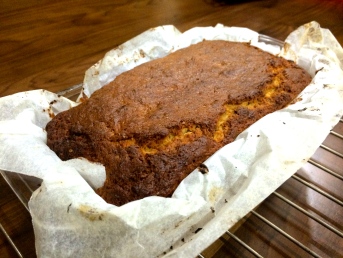
Fresh out the oven!

Ready in about 1 1/2 hours, this recipe will make one loaf

  • 2 cups all purpose flour
  • 1 teaspoon baking soda OR 3 teaspoons baking powder
  • 1/4 teaspoon salt
  • 1/2 cup butter
  • 1/2 cup brown sugar
  • 1/4 cup white sugar
  • 2 teaspoons vanilla extract
  • 1 teaspoon cinnamon
  • 2 eggs, beaten
  • 1/2 cup chopped dark chocolate
  • 2 1/3 cups mashed, ripe or overripe bananas
IMG_5048

A rich, banana bread batter

  1. Preheat the oven to 170 degrees celsius, and lightly grease a loaf pan (mine was 9×5 inch) or line it with parchment paper.
  2. In a large bowl, combine the sifted flour, baking soda OR baking powder, cinnamon, and salt.
  3. In a separate bowl, cream together the butter, sugar, and vanilla extract; stir in the eggs and mashed bananas until it is all well mixed.
  4. Pour the banana mixture into the dry ingredient mixture, and also add the chopped chocolate chunks; stir gently just to combine and moisten.
  5. Pour into the prepared loaf pan and bake for 1 hour 10 minutes, or until a toothpick in the centre of the loaf comes out clean.
  6. Let bread cool in the pan for 10 minutes, then remove the load and leave it to cool on a wire rack – enjoy!
IMG_5053

Just waiting for that breadknife to slice through

This recipe is relatively quick and very simple – but there are a few things to keep in mind to avoid your baking endeavour from going horribly wrong. Firstly, in the fourth step when both wet and dry ingredients are combined, combine them very gently! If you overmix, the bread will come out very dry – it is crucial to stir them just to moisten the dry ingredients with the wet. Secondly, in order for the bread to cook evenly, bake it on the middle rack of your oven. I have altered this recipe from the original by lowering the temperature slightly and extending the cooking time marginally, in response to comments claiming that the break was not cooked evenly enough. Moreover, I like my bananas to be super-mashed without any lumps so the flavour is deeply imbued into the bread, as opposed to the occasional bite of banana chunk – but to each his own.

Once served, make sure to store the loaf in an airtight container, bread holder, or keep it in the freezer if you wish to save it. It’s delicious toasted, but I personally love it just on its own!

IMG_5055

Perfect the way it is

Recipe adapted and altered from the original, posted by Shelley Albeluhn on http://www.allrecipes.com

Irresistably Moist, Chocolatey Brownies

I omitted the word ‘fudgy’ for a reason. This particular recipe was a failed attempt in the quest for the perfectly fudgy brownies, but it was an unexpected victory in the slightly less infamous struggle, that is, the search for the perfectly moist cakey brownies, to suit those for whom ‘fudgy’ is sickly. Admittedly, there aren’t that many people who feel that way, but there is an abundance of people like me: someone who will love a good brownie, fudgy or cakey, as long as it’s rich, succulent and jam-packed with chocolate flavour.

IMG_5037

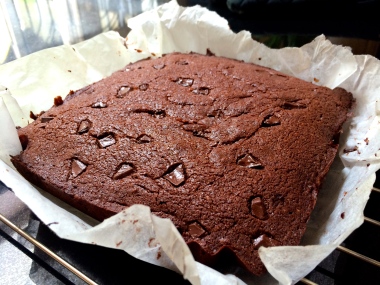
But seriously…how good does that look!?

I’m certain that if you reduce the cooking time by ten minutes, your brownies will turn out as fudgy and chewy as any fan of decadence could wish it to be, but the recipe I post below here will give you what I ended up with – moist brownies that border on chewy but are equally delicious (its been less than a day and I only have five tiny cubes of brownie left, thanks to my ravenous family). This recipe is quick, easy, and most of the ingredients should be readily available at home. Of course, adding chocolate chips, chopped nuts, dried fruits and the like are completely optional, but they do add a nice kick. I’m a chocoholic, so I decided to add a handful of chopped Valrhona 70% cacao dark chocolate – a little indulgent, a little pricey, but completely worth it in every bite.

Total time: 45 mins, Makes 16-25 servings depending on how large you cut your pieces

(Make sure to store your brownies in an airtight container once cooled, to avoid them going stale)

  • 1 1/3 cups all purpose flour
  • 1 teaspoon baking powder
  • 1/2 teaspoon salt
  • 1 cup butter
  • 1 cup cocoa powder
  • 1 1/2 cups sugar
  • 3 eggs
  • 1 1/2 teaspoons vanilla extract
  • 1 cup nuts/chocolate chips/dried fruits etc. or a mixture of all (optional)
  1. Preheat the oven to 170 degrees celsius.
  2. Combine the sifted flour, baking powder and salt in a small bowl.
  3. Melt the butter in a separate microwavable bowl, using the microwave at 10-15 second intervals on high.
  4. Once melted, transfer to a large mixing bowl and stir in the cocoa powder; mix in the sugar, eggs and vanilla extract.
  5. Mix in the dry ingredients, including the additional fillings if using.
  6. Grease a baking tray with butter, cooking spray, or line it with parchment paper.
  7. Pour the batter into the prepared tray, leveling out the surface and sprinkling the top with some chocolate chips if desired.
  8. Bake for 25-30 minutes or until the edges have produced that coveted crispy crust; take them out to cool completely and enjoy!
IMG_5042

16 large and decadent brownies

Recipe adapted from Sam #3’s version on http://www.food.com

Succulent scones that are finger-lickin’ good

When I think of succulence, or licking my fingers in the “I am shamelessly (and maybe a little sexily) going to savour every last bit” kind of way, I rarely think of scones. The centerpiece of any classic afternoon tea, the perfect scone is perhaps one of life’s most underrated and simple culinary delights: crisp on the outside, moist and fluffy on the inside, and when doused in a good helping of clotted cream and quality jam…it really is finger licking good. I baked these one afternoon when my little sister was having a sleepover, and along with her three whimsical friends, my parents and grandmother tucked into my homemade 4pm snack. The scones took me half an hour from start to finish, and they were all gone within a half hour of exiting the oven. One of my sister’s friends had three. Without the jam and the cream. Now that, is a self-standing, scrumptiously superb, succulent scone.

Image

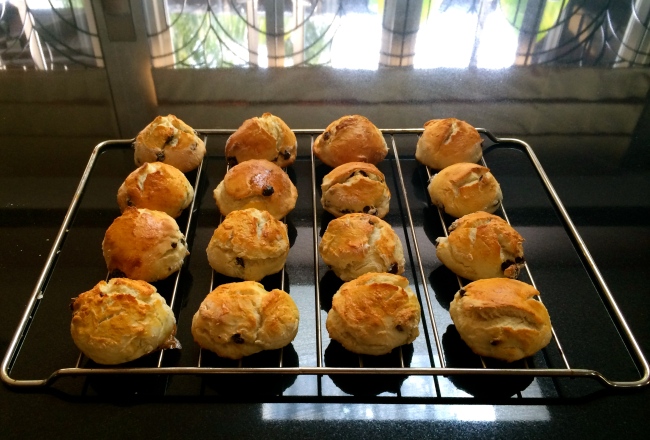
Mmmm…just wait till you crack’em open!

20 minutes prep, 10-12 minutes cooking time, makes 12 scones

  • 3 cups self-raising flour
  • 1 cup lemonade
  • 1 cup cooking cream
  • A pinch of salt
  • A handful of sultanas or other dried fruit (optional)
  • 1 egg, lightly beaten
  1. Sift the flour and salt into a large bowl.
  2. Make a well in the middle of the bowl and add the lemonade and cream; combine until a rich, wet dough is formed.
  3. Mix in a handful of sultanas or other dried fruit if desired.
  4. Using floured hands, place the dough on a well-floured surface and knead until pliable.
  5. Flatten until the dough is at an even thickness of approximately one inch.
  6. Cut the dough into rounds using a small and circular cookie cutter dipped in flour, and arrange on a lightly greased tray.
  7. Using a pastry brush, coat the tops of the scones in the egg wash.
  8. Bake in a preheated oven at 220 degrees celsius for 10-12 minutes or until golden brown; place scones on a wire rack to cool.
  9. Serve with clotted cream, high-quality jam and a pot of your favourite tea for an afternoon delight!

(Recipe adapted from Irena Hall’s on http://www.taste.com.au)